How to Deploy Your AiGanak Content Factory
Follow these 6 steps to activate your AI automation:
1. Prepare the File
- Download and Unzip the
AiGanak-Content-Factory-v1.zip to your desktop. You will need the .json file inside.
2. Import to Make.com
- Log in to your Make.com account.
- Click "Create a new scenario" (top right).
- Click the Three Dots (...) in the bottom menu and select "Import Blueprint".
- Select the
AiGanak-Content-Factory-v1.json file.
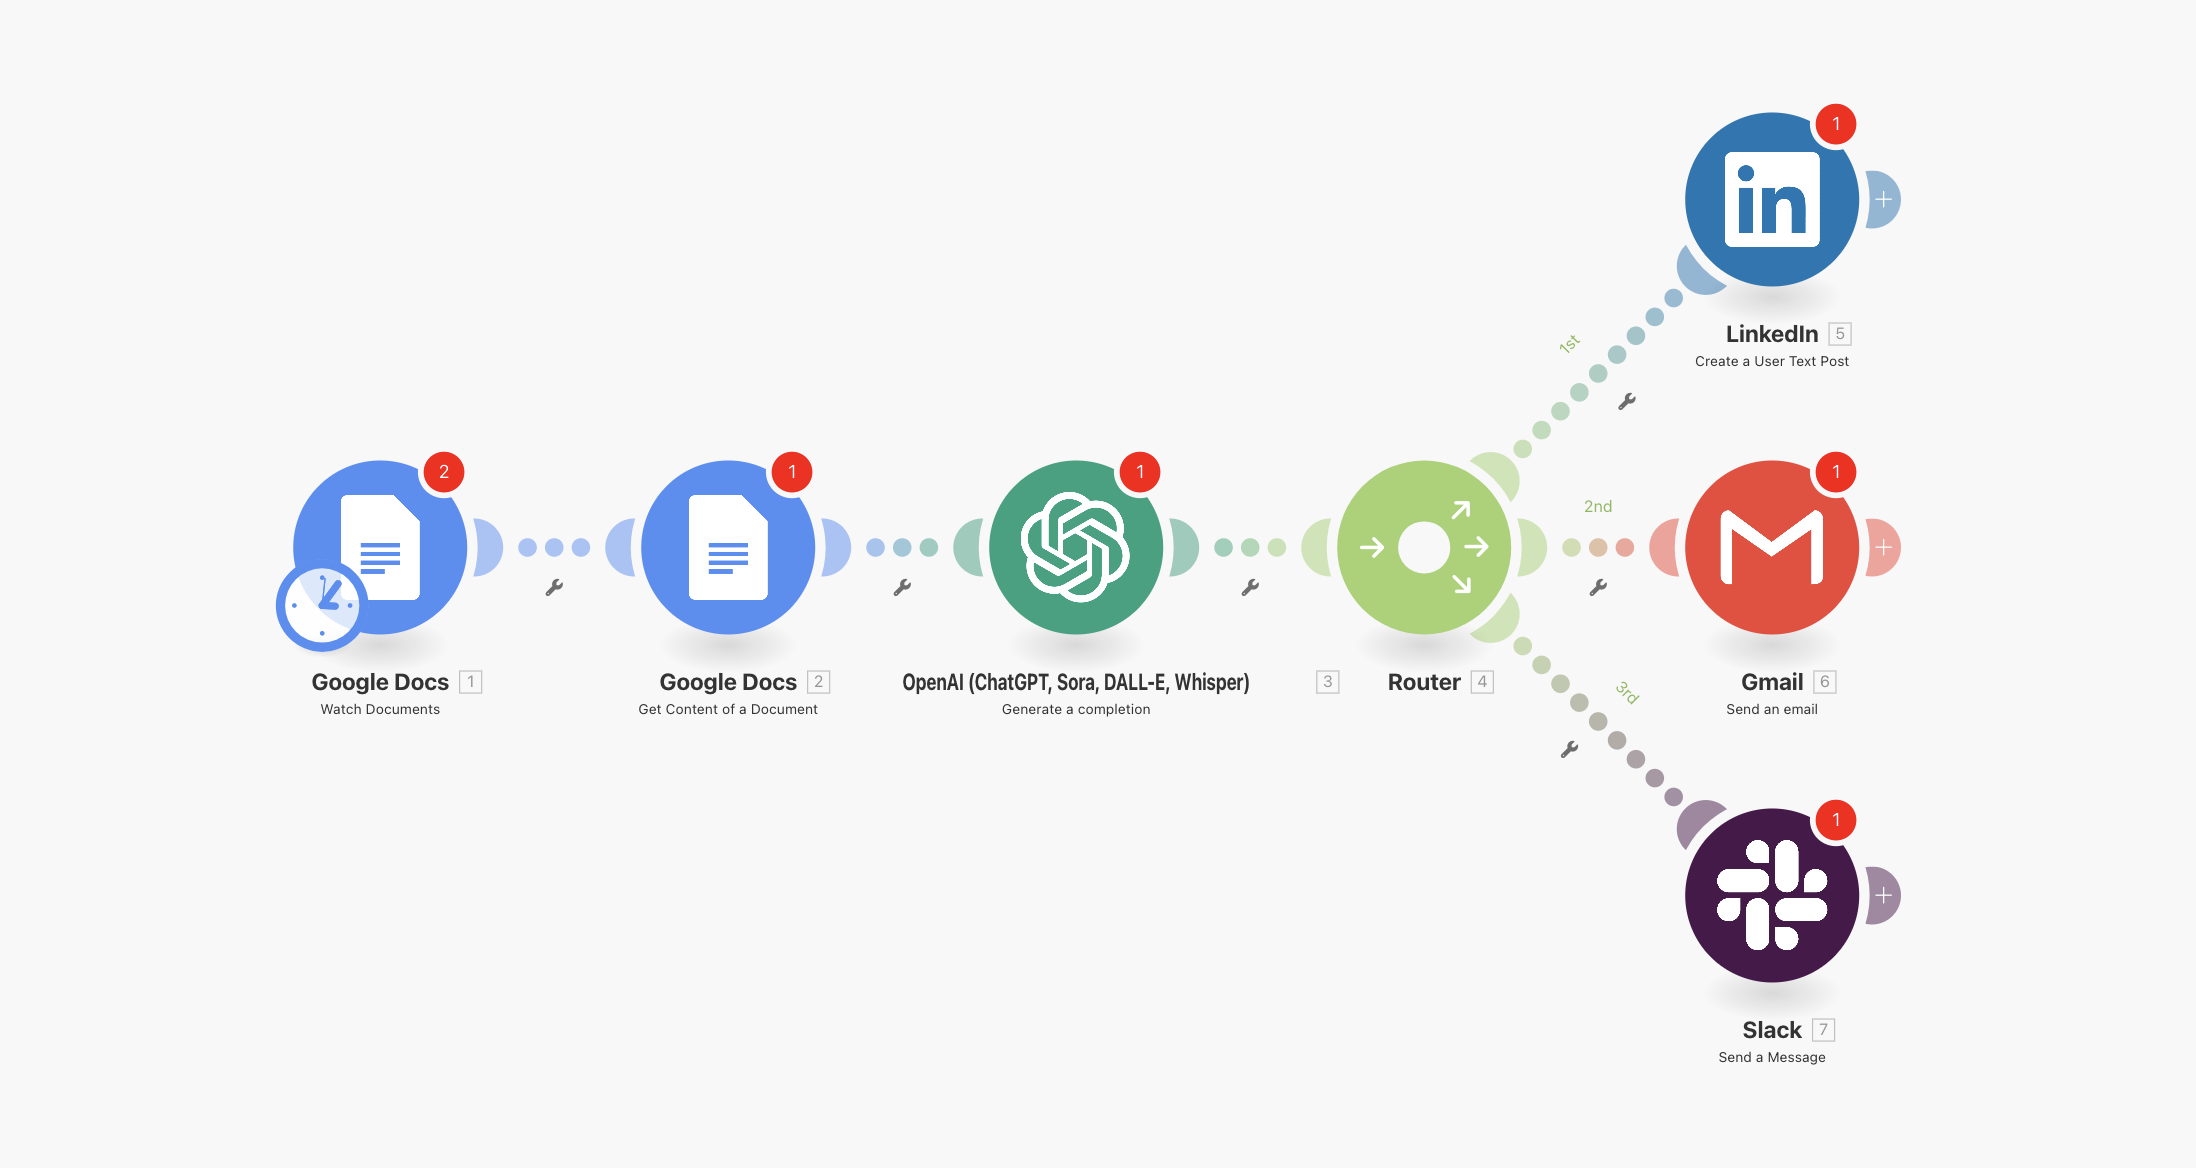
3. Connect Your Content Source (Google Docs)
- Click the Google Docs module (the trigger).
- Click "Add" to create a connection and authorize your Google account.
- Select the specific Folder where you will drop your "Seed" articles or blog drafts.
4. Connect OpenAI (The Content Strategist)
- Click the OpenAI module.
- Click "Add" and paste your OpenAI API Secret Key.
- Note: This module is pre-configured with a custom "Tone-Shifting" prompt to rewrite your content for different social platforms automatically.
5. Connect Your Social Channels
- Click the LinkedIn and X (Twitter) modules at the end of the branches.
- Click "Add" to authorize your professional profiles.
- The AI-generated posts are already mapped to the correct "Post Content" fields; you just need to verify the accounts.
6. Test & Activate
- Drop a test document into your designated Google Drive folder.
- Click "Run Once" in Make.com.
- Check your social media "Drafts" or "Posts" to see the transformed content.
- Click the Scheduling Switch to "ON" to begin scaling your content automatically.